How to reduce image file sizes without losing quality

Our beloved /image/optimize Robot and /image/resize Robot are our most powerful tools for combating bloated file sizes and long execution times. We'll take a look today at some real-world figures to see exactly how much these Robots can reduce your file sizes.
Method
In order to collect the data for this blog post, I created a small Python script that will create an Assembly to optimize several different test images, tweaking a single parameter with each iteration. That way, each Assembly is isolated from the previous ones, providing us with more sanitary results. Each file type that we test has at least two test images, too.
You can find the code for the script here on GitHub.
Two Templates were used to test each Robot individually. Encapsulating each Robot is important to ensure our data is only reflecting the impact that specific Robot had. Both Templates are shown below.
{
  "steps": {
    ":original": {
      "robot": "/upload/handle"
    },
    "optimize": {
      "use": ":original",
      "robot": "/image/optimize",
      "preserve_meta_data": false,
      "priority": "conversion-speed"
    }
  }
}
{
  "steps": {
    ":original": {
      "robot": "/upload/handle"
    },
    "quality": {
      "use": ":original",
      "robot": "/image/resize",
      "result": true,
      "quality": 20,
      "imagemagick_stack": "v3.0.0"
    }
  }
}
We should also define a metric to measure the overall file size reduction - % Size Difference. It's the percentage difference between the input and output file sizes. Here's the formula we use to calculate this:
Now, let's take a look at some of the data.
Priority
The first parameter we'll take a look at is the priority. We have the choice between two different
algortihms,compression-ratio and conversion-speed, depending on whether we'd like a slightly
lower compression ratio of ~18% for faster execution times, or a higher compression ratio of ~31%
for minimal file size.
Compression-ratio
As you can see below, using the compression-ratio priority will generally result in a greater file
size reduction than if you're using the conversion-speed priority.
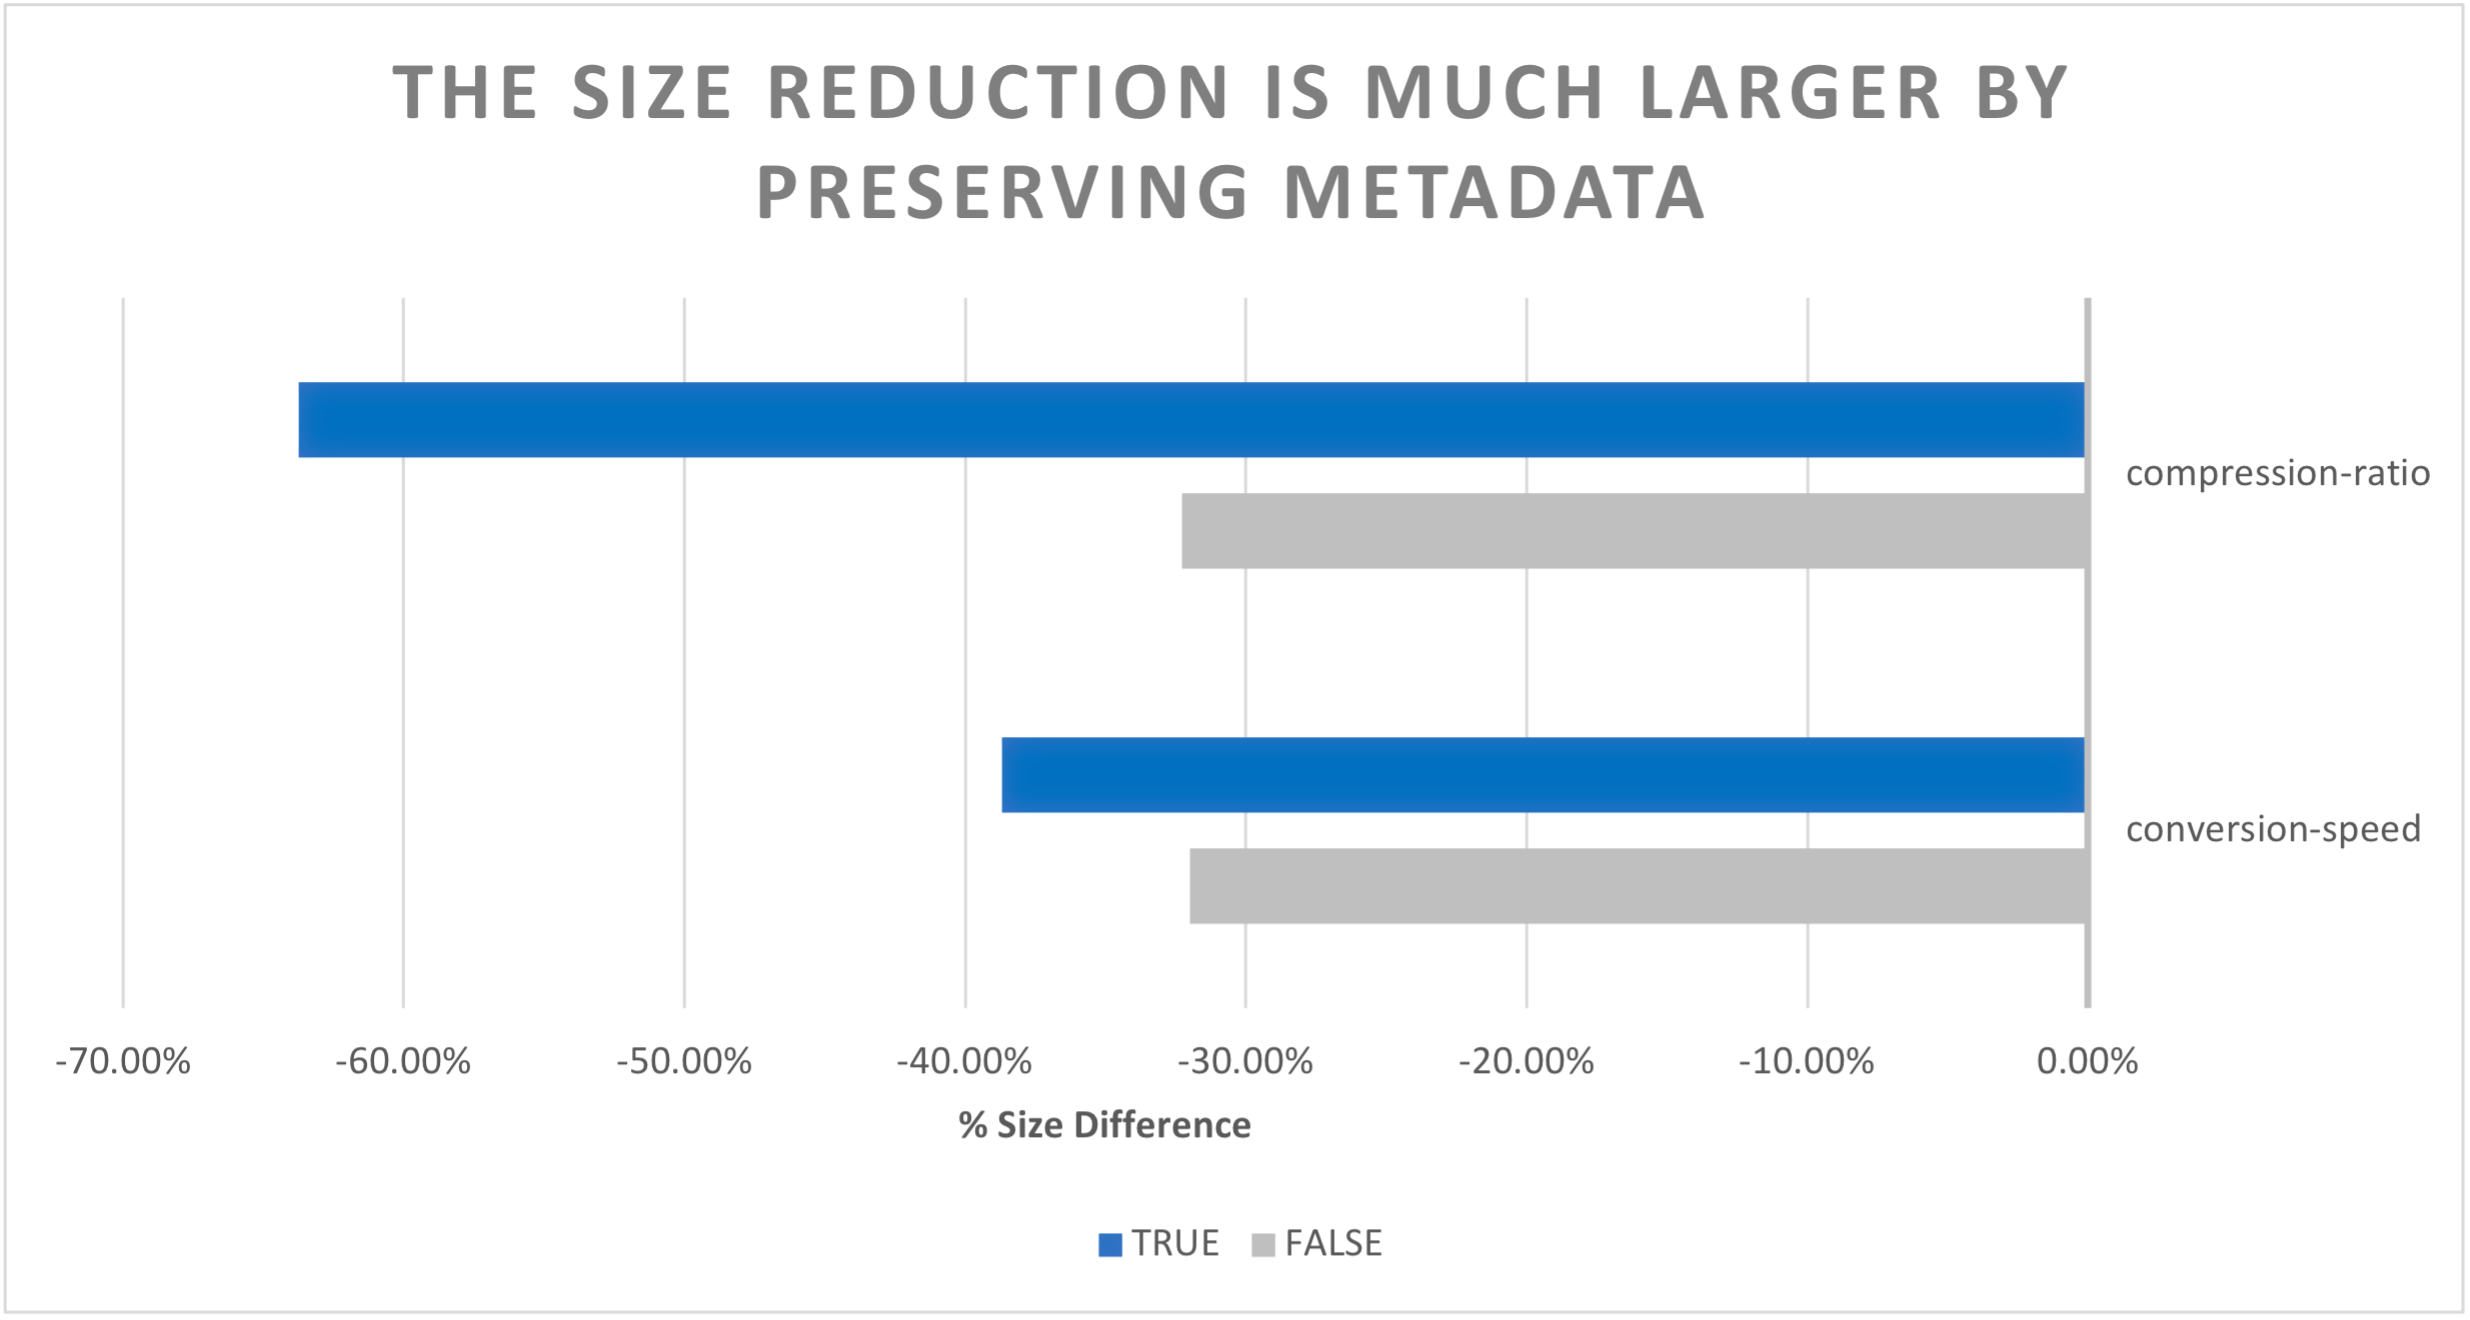
However, if you decide not to preserve the file's metadata, both priorities will use the same compression algorithm, which explains why the size reduction is the same for both priorities.
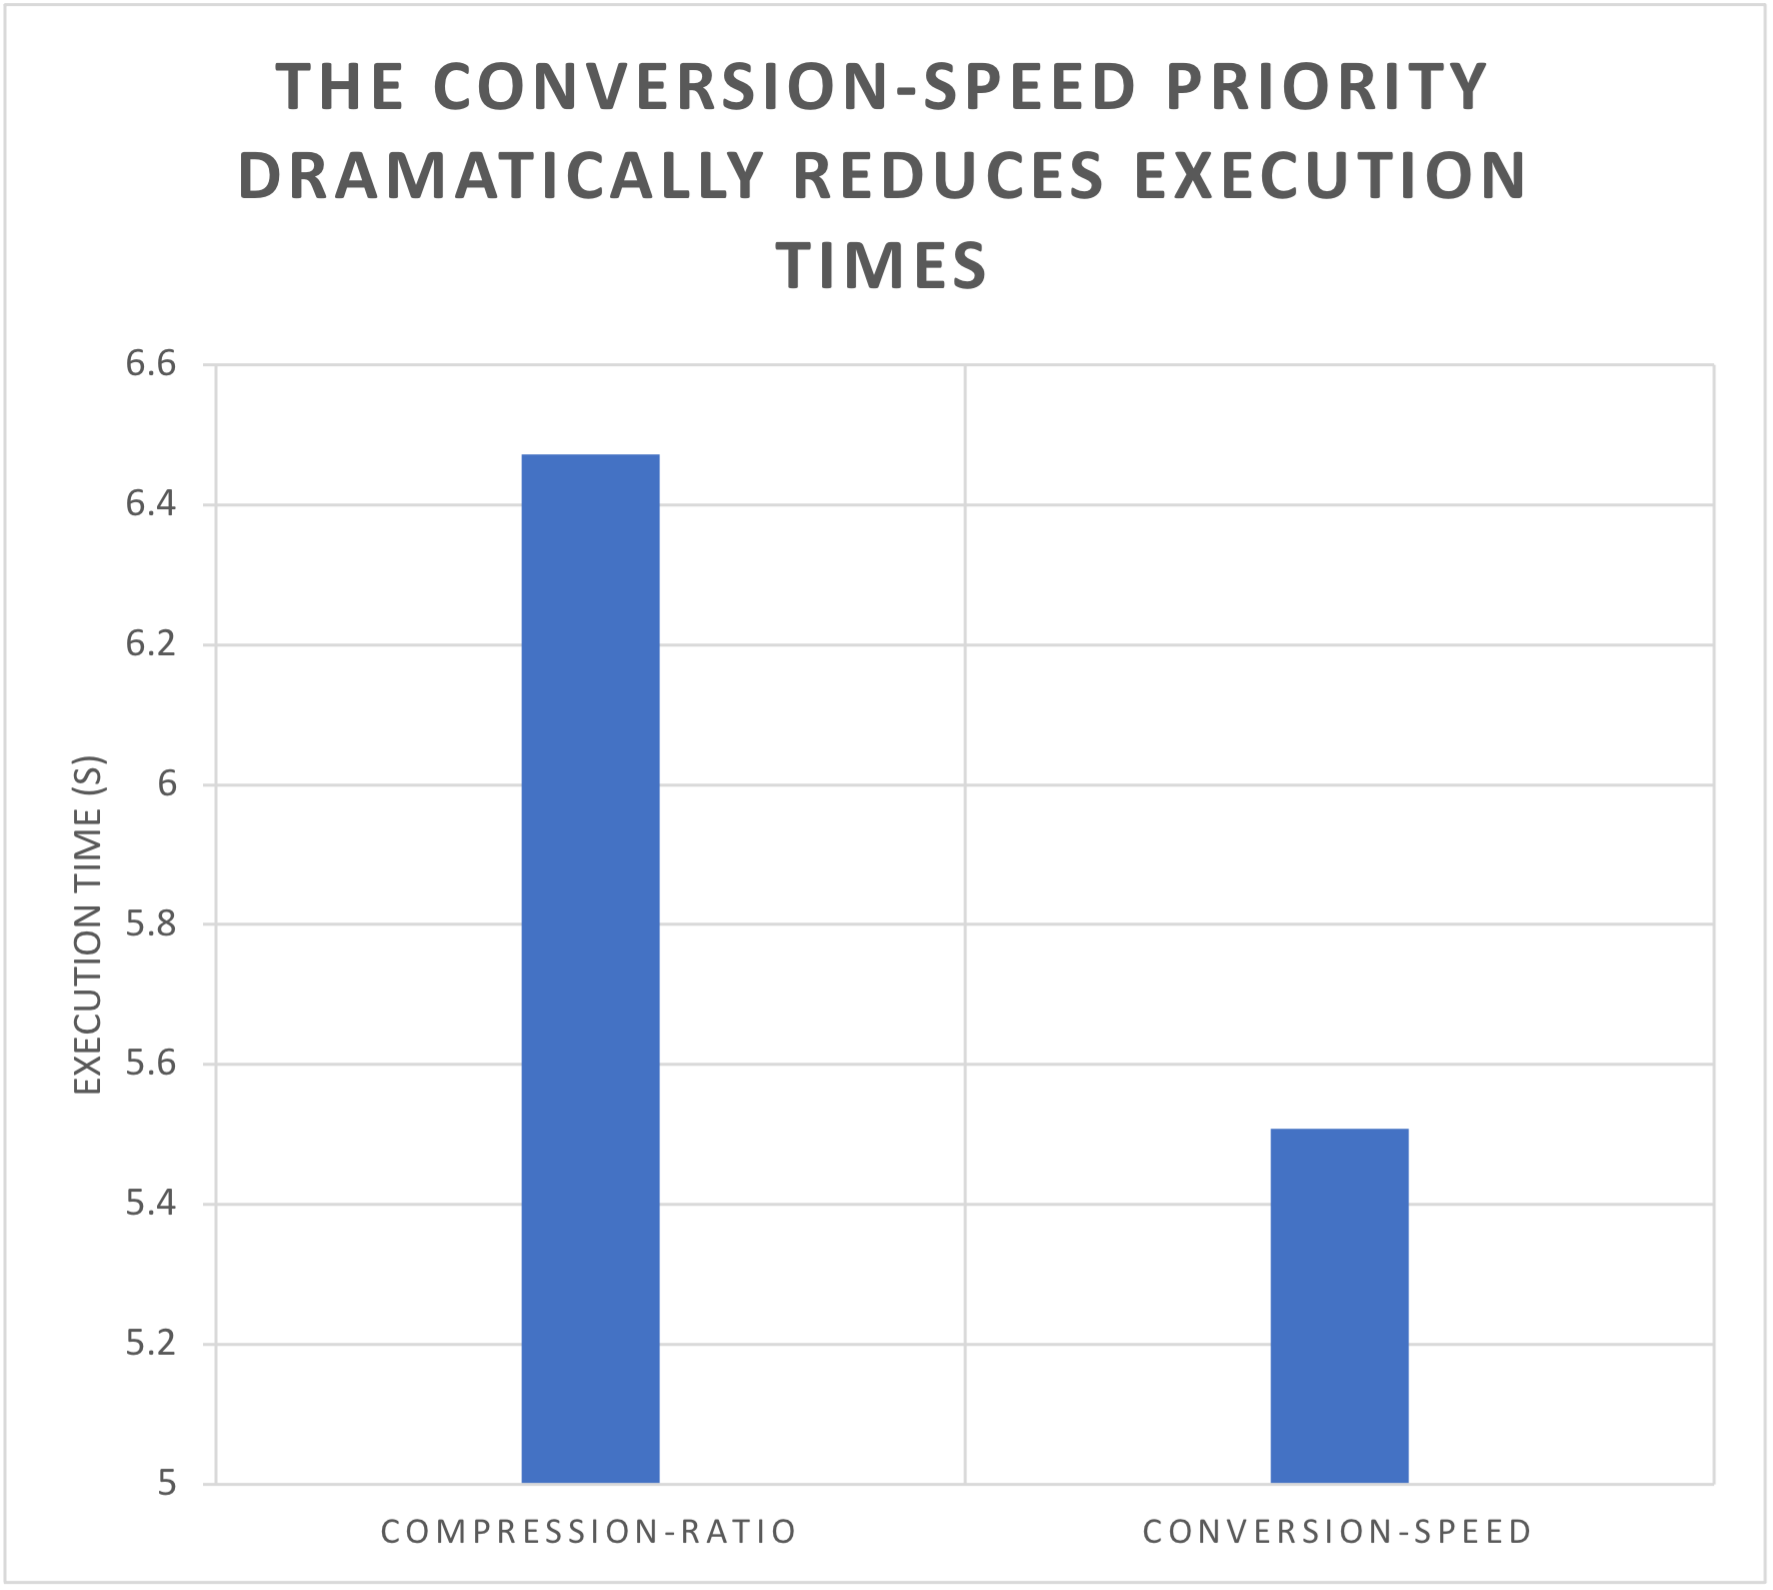
Conversion-speed
The conversion-speed priority, as implied, will help combat long execution times. As demonstrated
below, out of the approximately fifty Assemblies ran, the overall execution time was
reduced by an average of one second while using the conversion-speed priority.
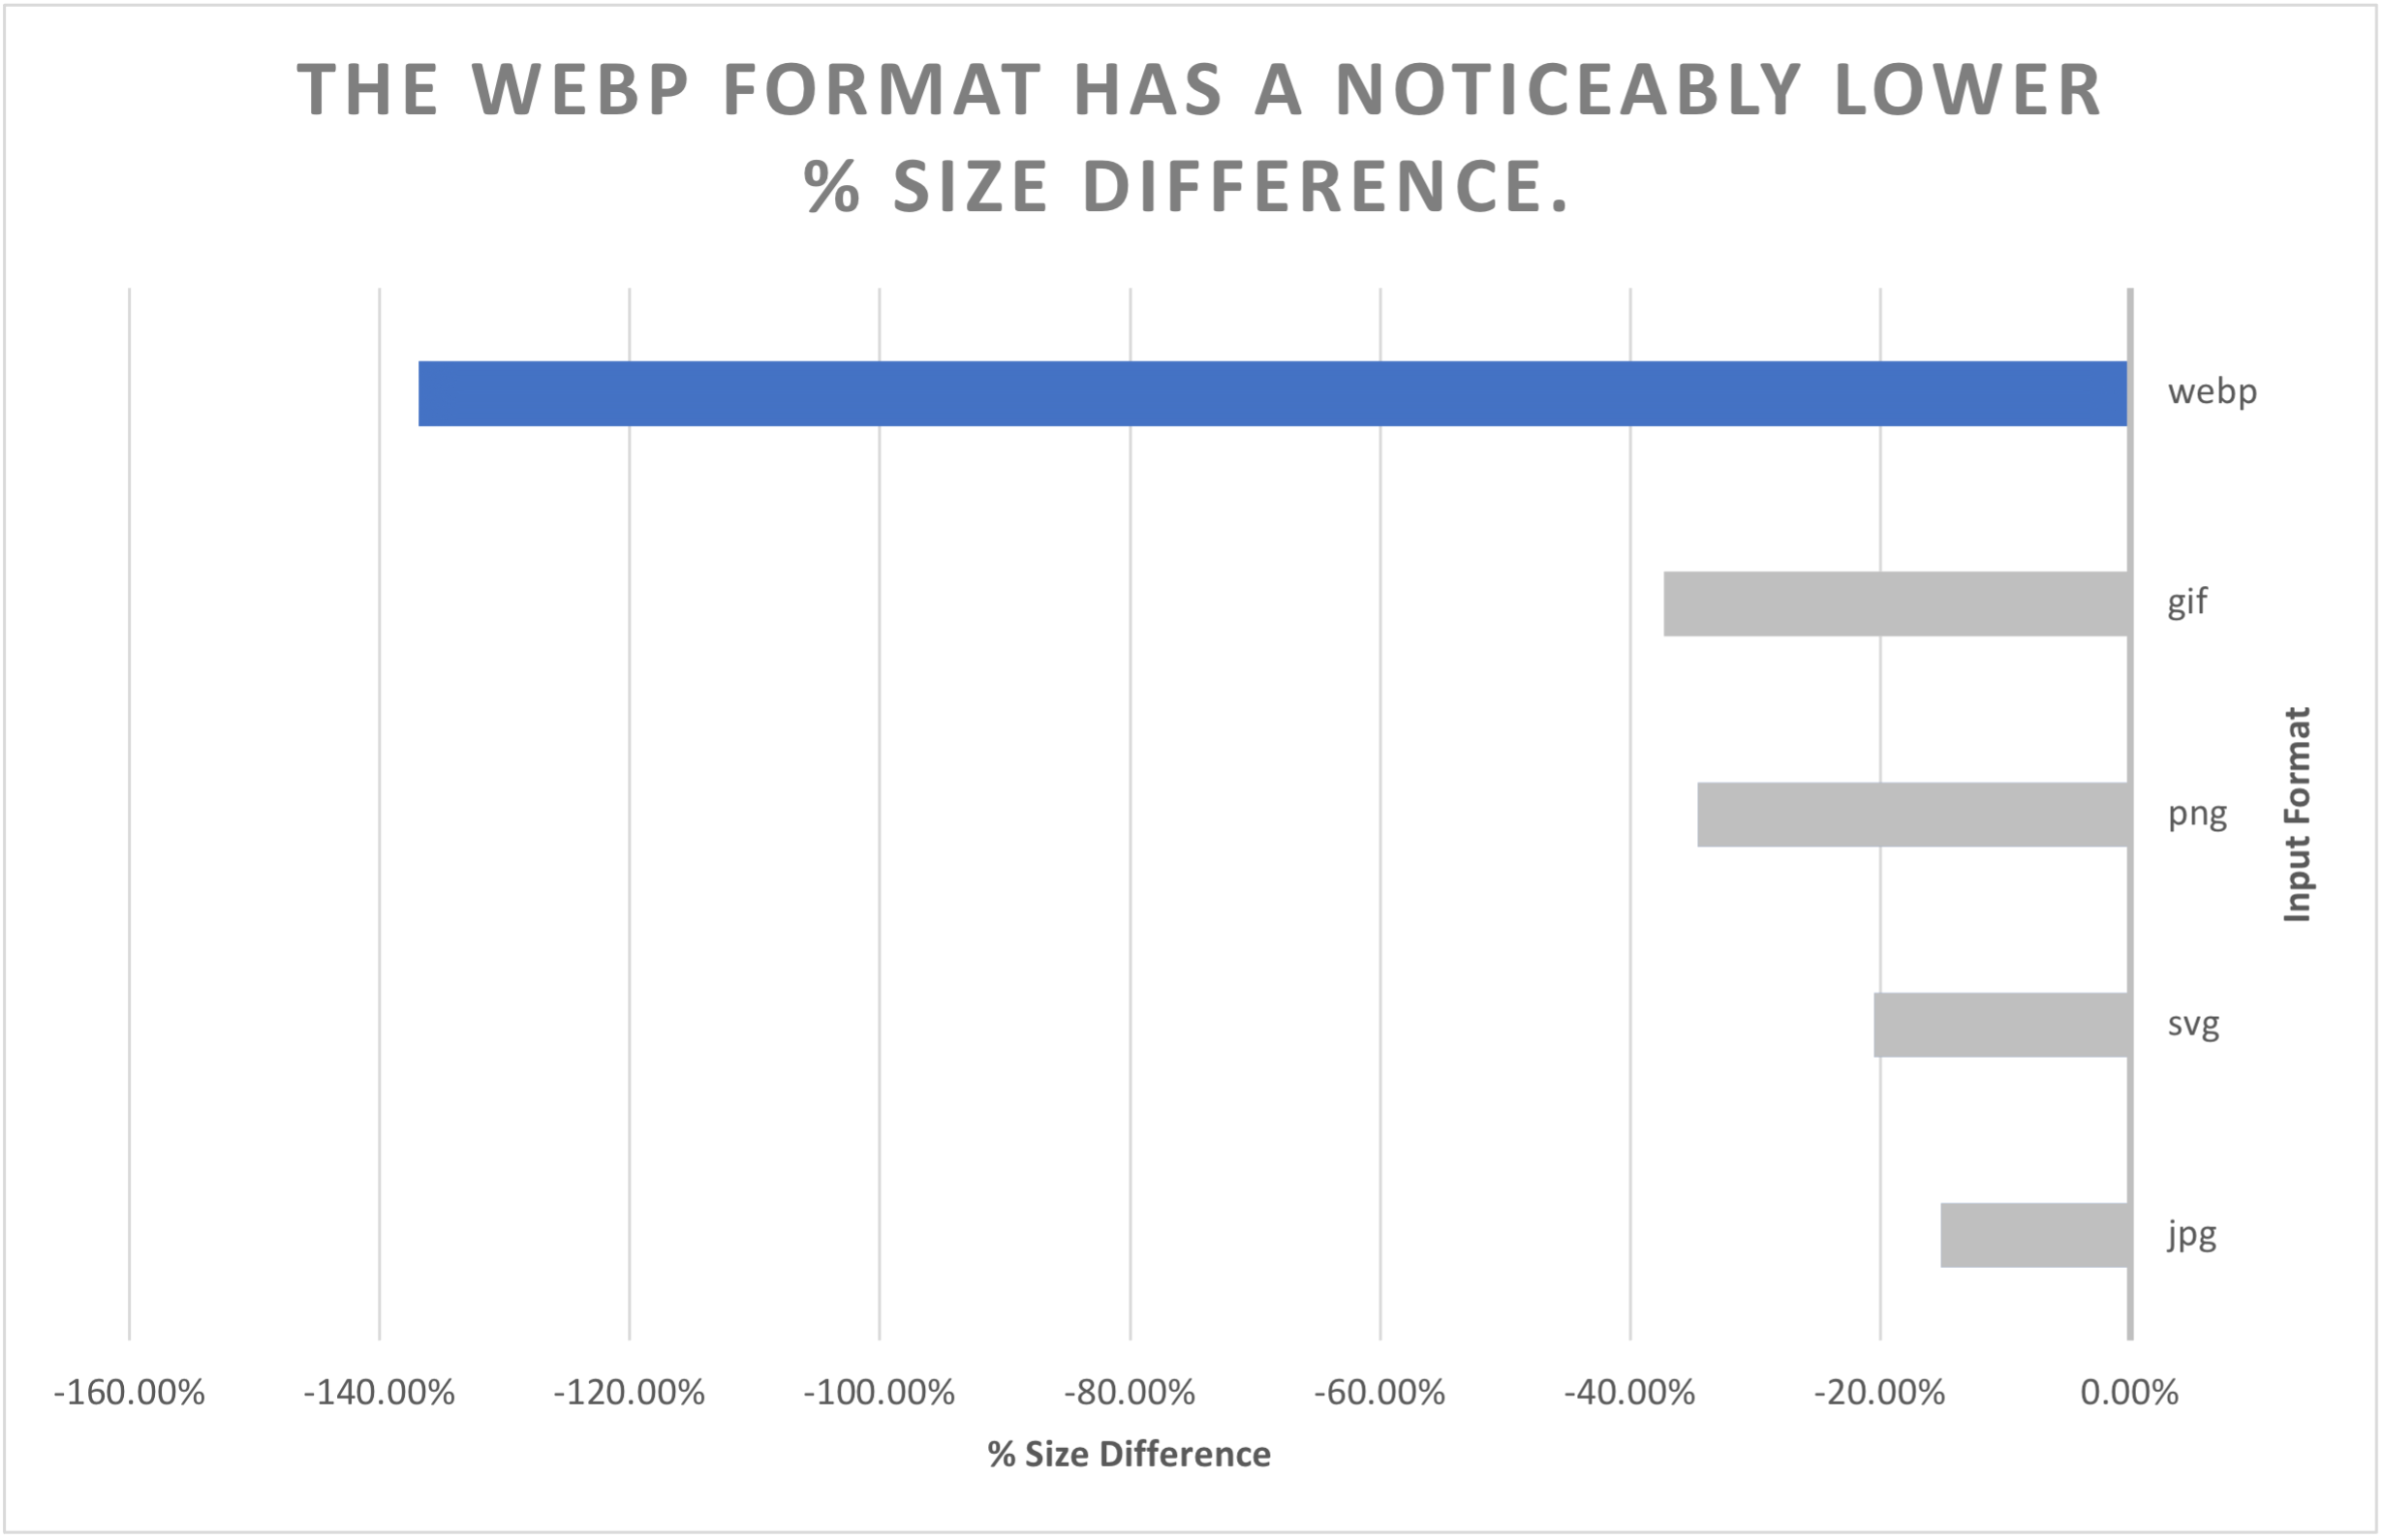
Input format
Of course, the extent of our optimizations is limited by the file type. Let's take a look at which file types you can expect to gain the most from.
Size difference
As is evidently clear below, .webp files show a dramatically higher average file size reduction, while .jpg files show almost no size reduction. The range between .gif, .png, .svg and .jpg is narrow, too – so results may vary more depending on the files you choose to use.
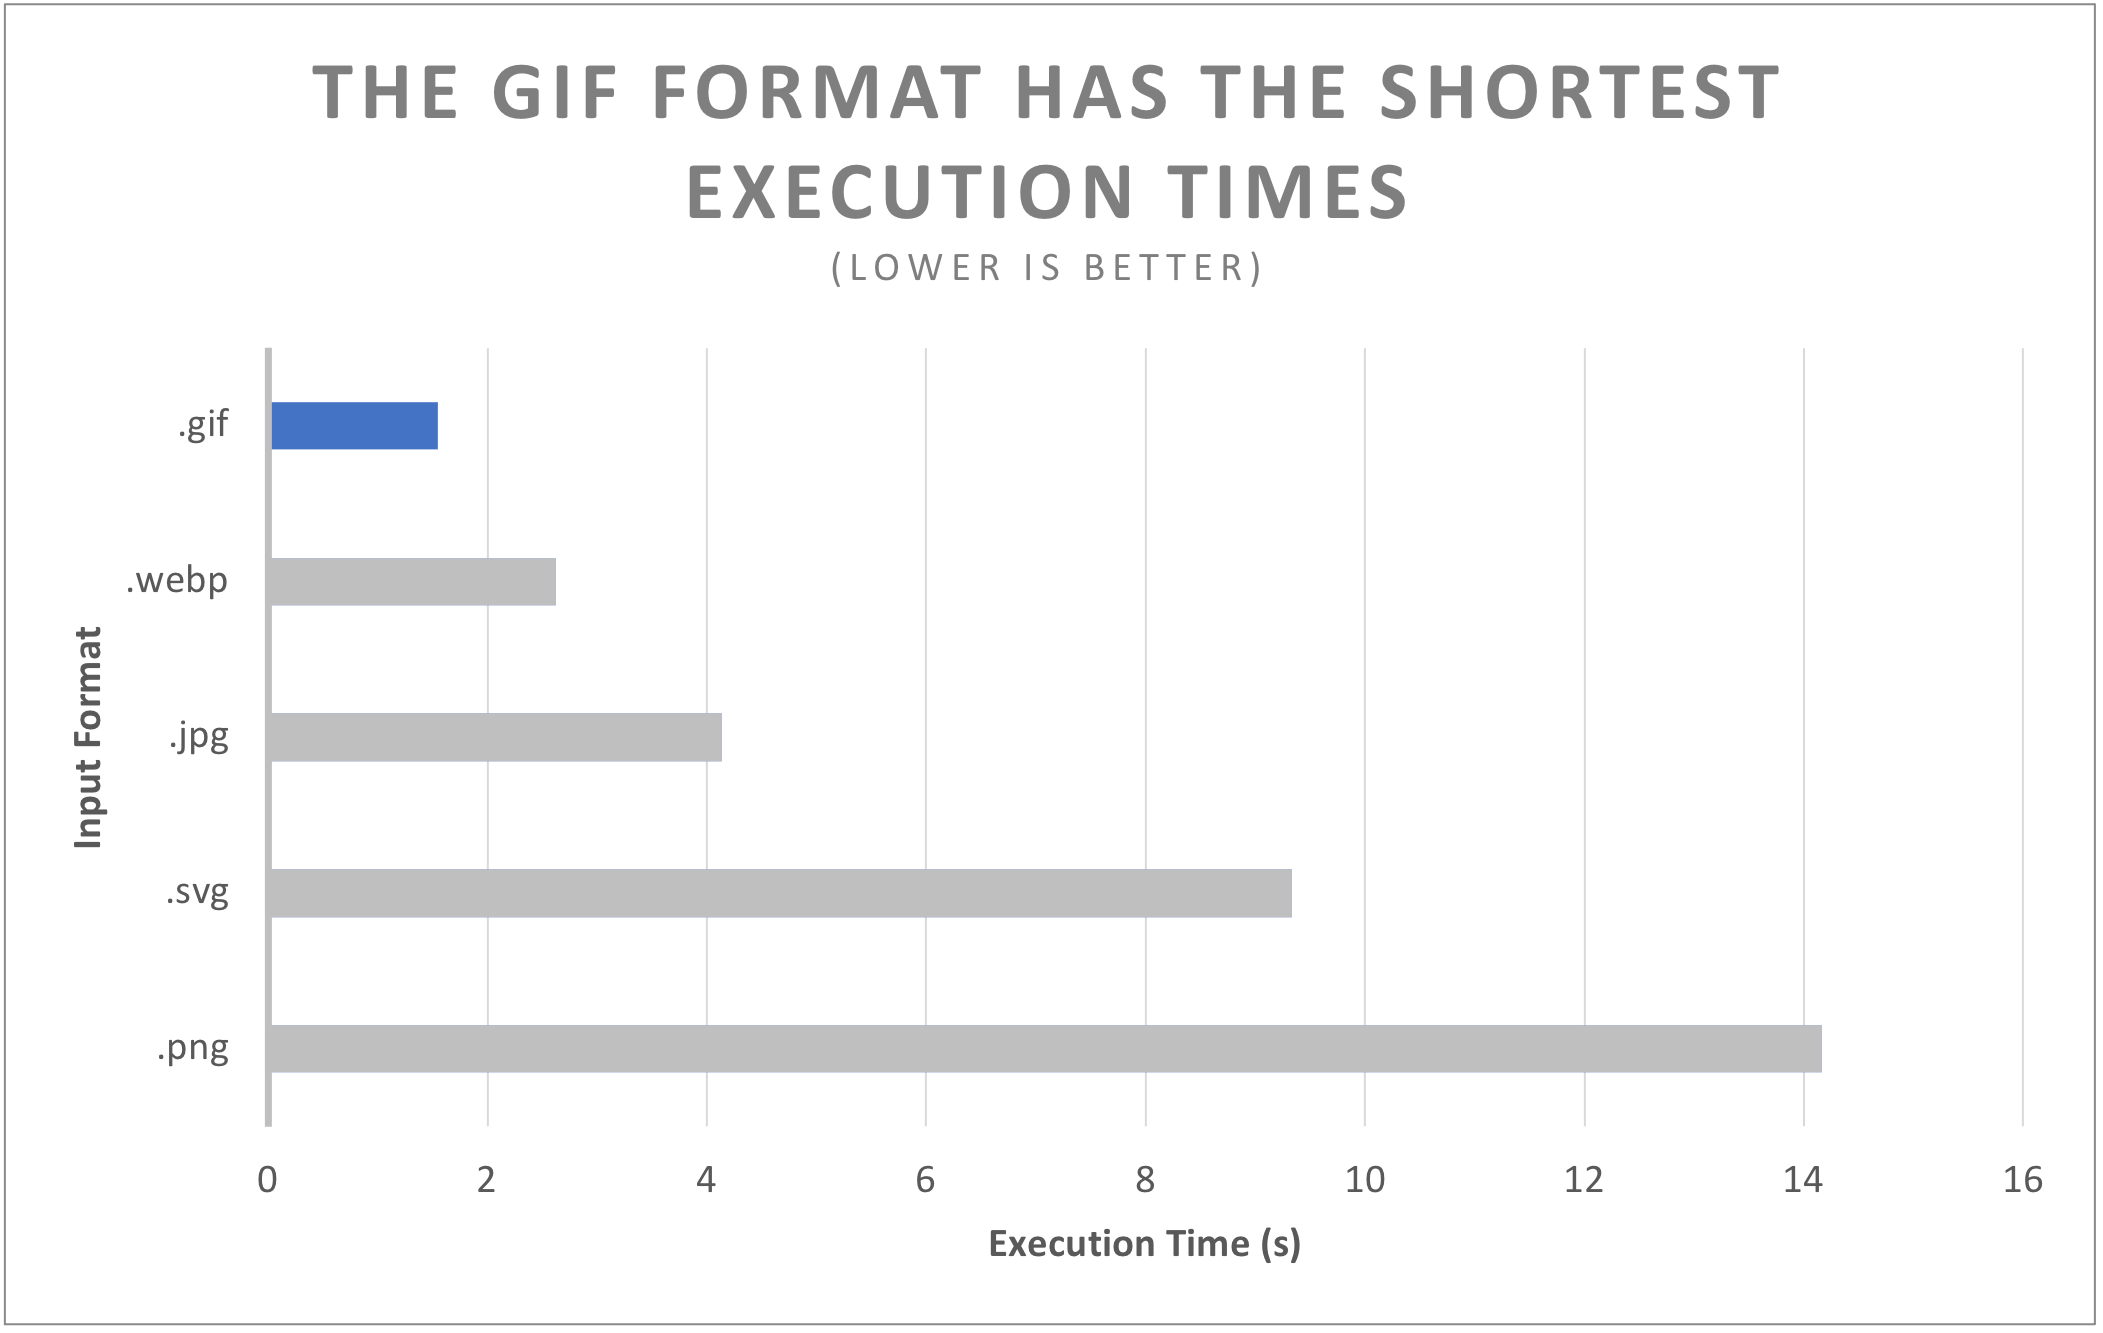
Execution time
In terms of execution times, .gif is a clear winner, with .webp coming in at a close second. However, perhaps the more surprising result from this is how much longer both .svg and .png files took to process, perhaps due to both of them using lossless compression.
Quality
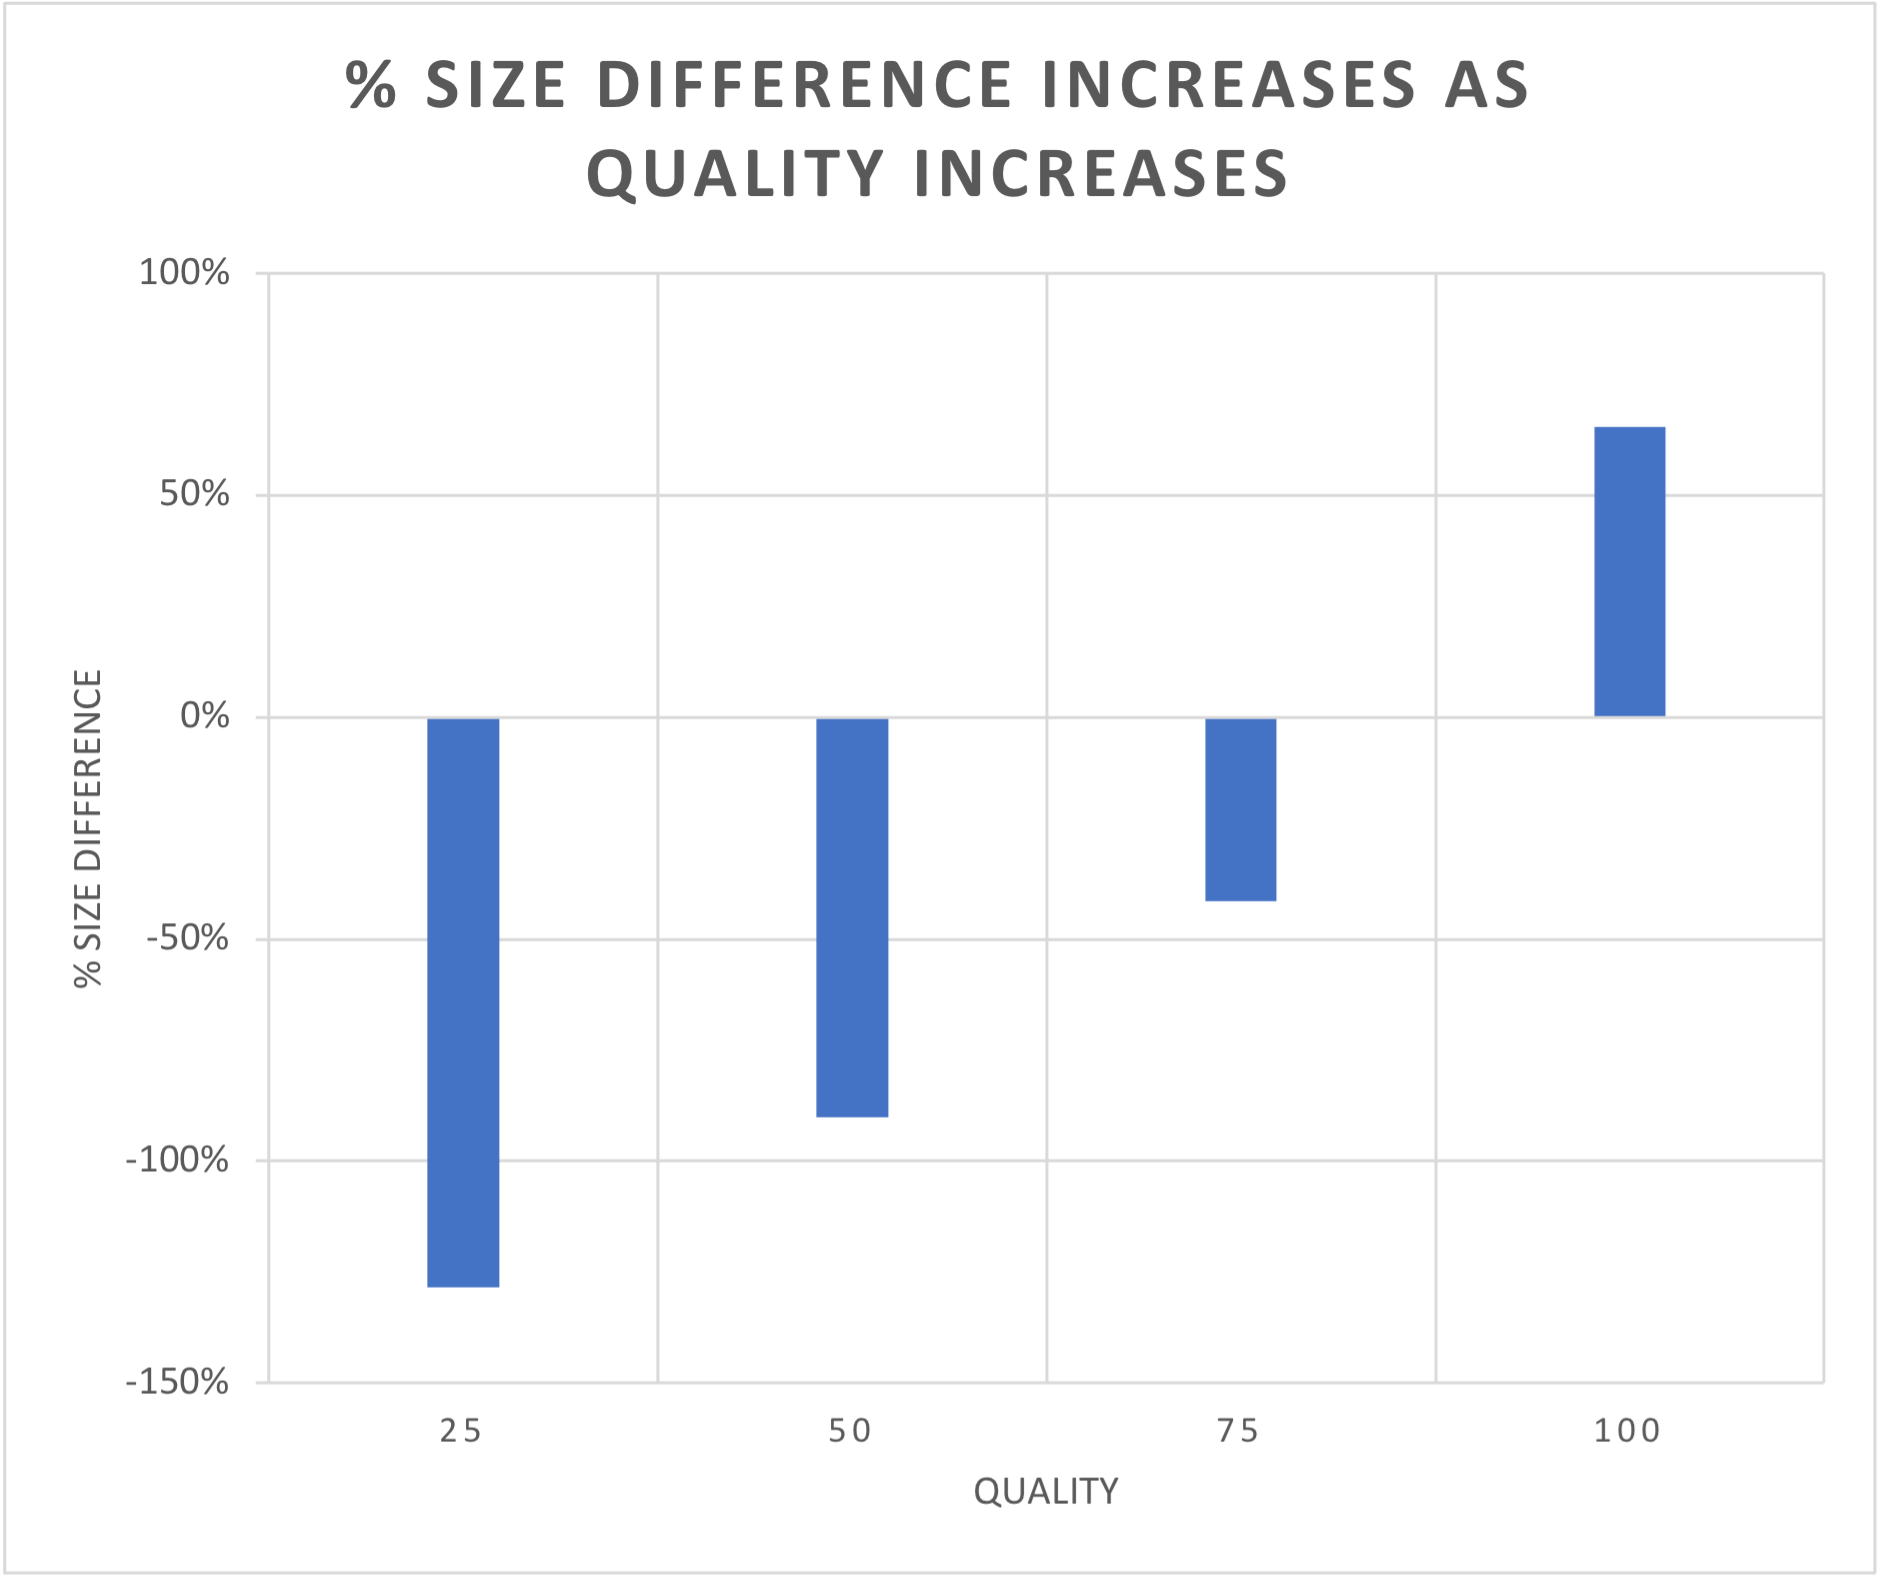
File Size
One of the best ways to reduce file size is by reducing the quality with the /image/resize Robot. As you can see in the graph below, a quality of 75 or below will result in signifcant file size reductions. However, quality values above 75 cause the file size to acutally increase.
Reducing the quality also brings improvements to the overall execution time of an Assembly. The differences in this case are more linear.
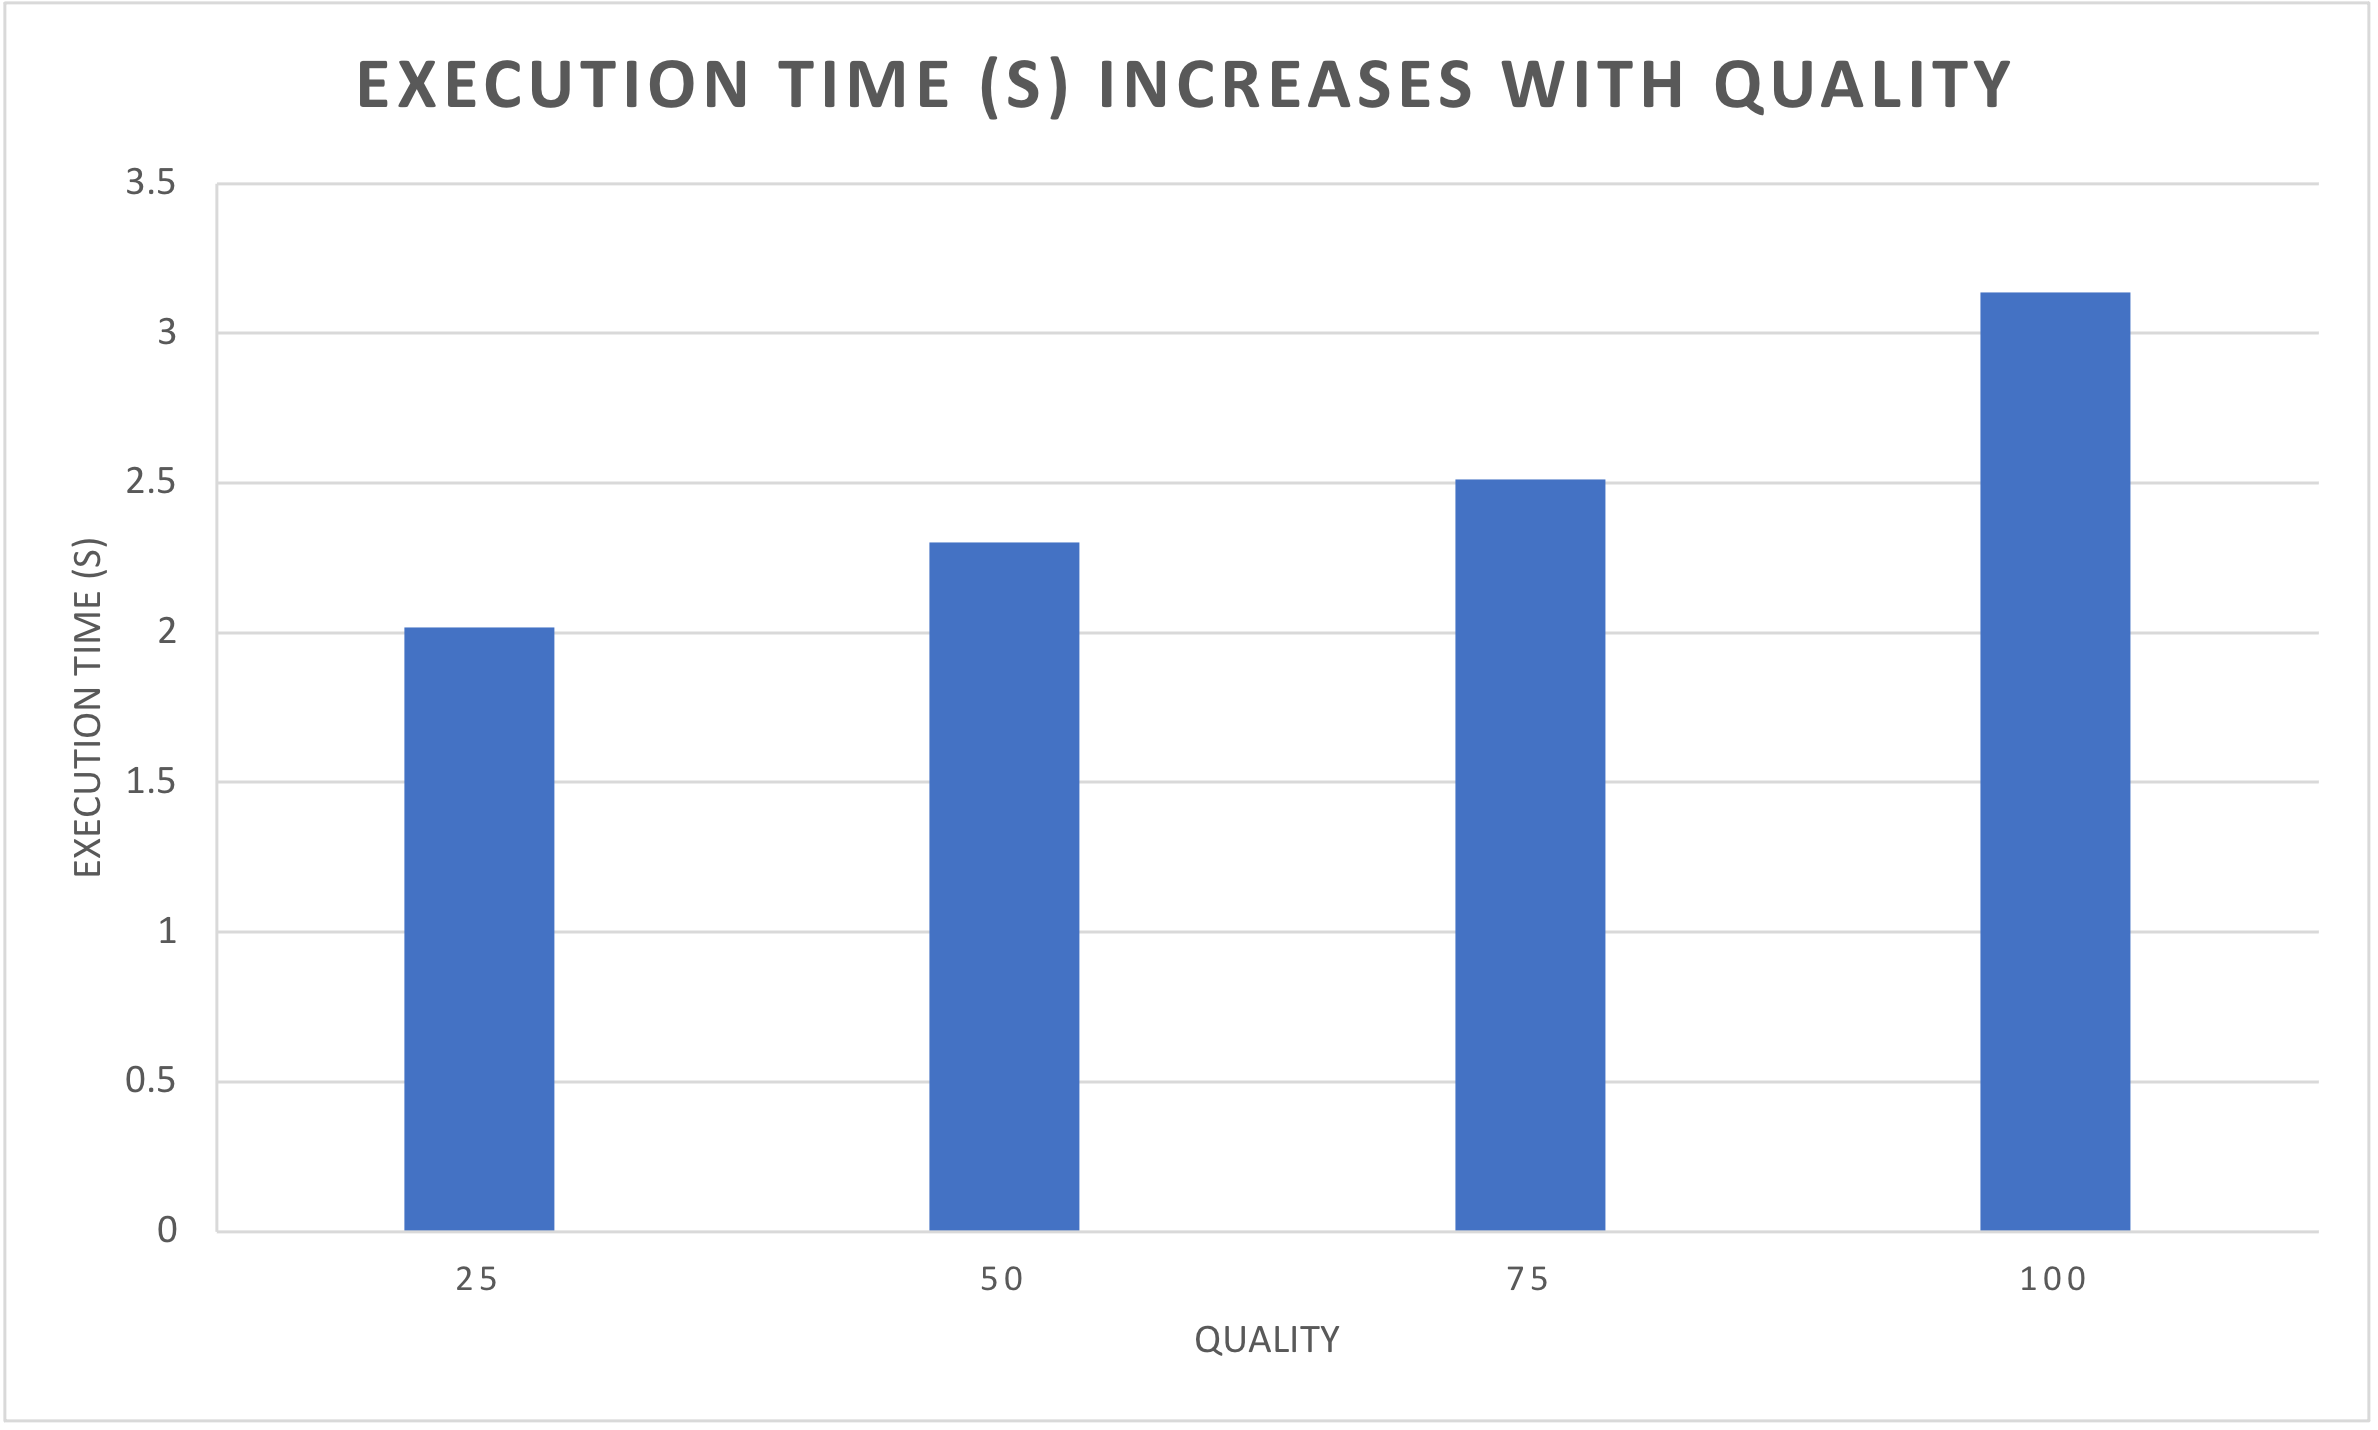
Image Quality
So, what impact does the quality actually have on how an image looks?
Here's the same image in four different qualities. At lower qualities, the number of colors is reduced, resulting in the color banding that you can see below.

This is quite a large image, however, with a lot of different colors. The quality difference is practically invisible with simpler images – such as the Transloadit logo.

Quality: 25
There's only two colors in this image, meaning you can bring the quality value down without seeing any difference.
Of course, it's best if you do some small experiments yourself to find a quality value that strikes a nice compromise between file size and image quality.
Conclusions
After throwing all that information at you, let's take some time to comb through and see how this can benefit you right now.
Perhaps the most important detail that you can take away is the use of the .webp format. Regardless of whether you're looking to reduce execution times or file-sizes, you will see a benefit here. Combining this with a slightly reduced file quality in a single /image/resize Step will likely yield the best results.
Another important take-away is choosing the appropriate priority for your use case. The
compression-ratio algorithm would be my choice, due to how significant the size reduction can be.
But again, feel free to trial it yourself.
Lastly, I hope this blog has inspired you to go on an optimization spree with your Templates, and that it'll be a nice springboard for the start of your journey. We'd be happy to help guide you where possible, so please also reach out to us via support or Twitter.